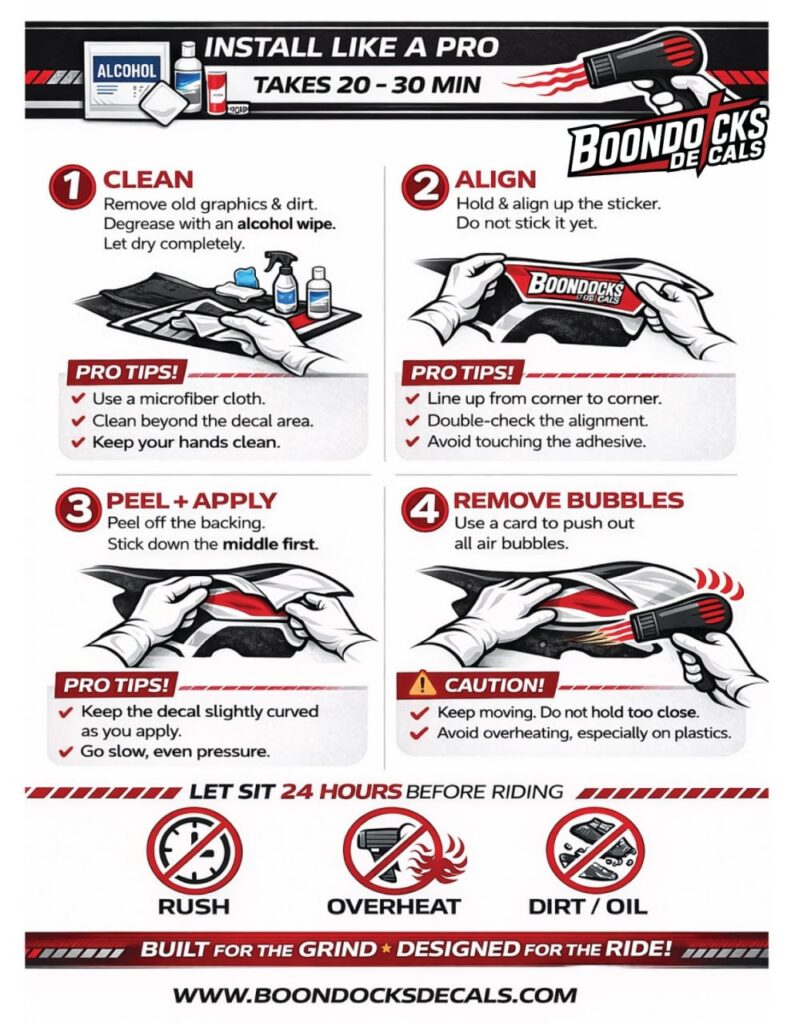
This Installation Guide will help you apply your motocross graphics like a pro. By following these steps carefully, you can achieve a clean, bubble-free finish that lasts through real riding conditions.
Most installations take around 20–30 minutes, depending on your experience and attention to detail.
Before You Start
Before beginning this Installation Guide, make sure you have:
A clean working area
A microfiber cloth
Isopropyl alcohol or cleaning solution
A squeegee or plastic card
Optional: heat gun or hair dryer
Preparing properly will make the installation process much easier and smoother.
Start by removing any old decals, dirt, or residue from your bike.
Use an alcohol wipe or cleaning solution to fully degrease the surface. Make sure everything is completely dry before moving to the next step.
Pro Tips:
Use a microfiber cloth for best results
Clean slightly beyond the application area
Avoid touching the cleaned surface
Step 2: Align the Graphics
Before sticking anything, position your graphics correctly.
Take your time to align each piece and ensure everything fits perfectly. This is one of the most important steps in this Installation Guide.
Pro Tips:
Start from one corner
Double-check placement
Do not touch the adhesive side
Step 3: Peel and Apply
Slowly peel off the backing paper and begin applying the graphic.
Start from the center and work your way outward to avoid air pockets. Apply gentle and even pressure.
Pro Tips:
Keep the graphic slightly curved
Apply slowly and carefully
Do not rush the process
Step 4: Remove Air Bubbles
After applying the graphic, use a squeegee or card to push out any trapped air.
Work from the center toward the edges to ensure a smooth finish.
Important Tips:
Apply light heat if needed
Keep the heat moving
Avoid overheating the material
Step 5: Use Heat for Better Adhesion
Heat helps the adhesive bond properly, especially on curves and edges.
Use a heat gun or hair dryer carefully to activate the adhesive and improve durability.
Step 6: Final Check
Go over all edges and corners to make sure everything is properly sealed.
Press down any loose areas and ensure the graphics are fully attached.
Step 7: Let It Set
Allow the graphics to sit for at least 24 hours before riding.
This gives the adhesive enough time to fully bond with the surface and ensures long-lasting performance.
Common Mistakes to Avoid
Even with a good Installation Guide, mistakes can happen. Avoid these:
Rushing the process Applying on dirty or oily surfaces Overheating the graphics Skipping alignment
Taking your time will always give better results.
Material & Application Standards
For best results, high-quality materials and proper techniques are essential. If you want to learn more about professional adhesive technology, you can explore 3M, a trusted leader in graphics materials.
Final Thoughts
This Installation Guide is designed to help you get the best possible result from your graphics.
With the right preparation and careful application, your bike will look clean, professional, and ready for the track.
Get Your Custom Dirt Bike Graphics Designed Today
15% off for first time customers CODE: NEWFRIEND15