High Quality & Great Pricing l # Plates from $29 l Dirt Bike Kits $175 l Stickers 12 @ $9
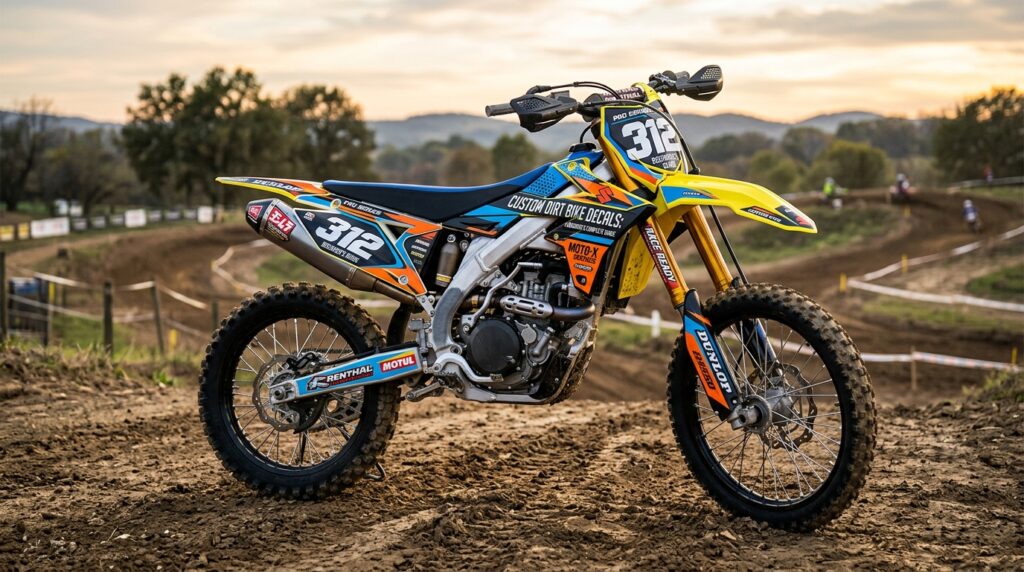
Customizing a dirt bike is one of the easiest ways to give it a unique identity. Whether you ride on weekends, participate in motocross racing, or simply want your bike to look more aggressive, a quality graphics kit can completely transform its appearance.
If you’re new to motorcycle graphics, this Custom Dirt Bike Decals: A Beginner’s Complete Guide will help you understand everything from choosing the right design and materials to preparing your plastics and maintaining your finished graphics. For custom designs and professional-quality dirt bike graphics, visit Boondocks Decals.
Custom Dirt Bike Decals: A Beginner’s Complete Guide starts with understanding what you’re actually buying.
Dirt bike decals are printed vinyl graphics designed to fit specific motorcycle plastics. They can cover areas such as shrouds, front and rear fenders, side panels, and number plates.
Unlike generic stickers, properly designed graphics are created around the contours of your motorcycle. This provides a more professional appearance and allows the design to flow naturally across different panels.
Custom decals can include race numbers, rider names, logos, colors, patterns, and other design elements.
One of the biggest advantages discussed in Custom Dirt Bike Decals: A Beginner’s Complete Guide is personalization.
A stock motorcycle may look great when it leaves the showroom, but custom graphics allow you to make it your own. You can select colors and designs that match your personality, riding gear, or race team.
Custom graphics can also help give an older motorcycle a refreshed appearance without replacing the entire bodywork.
For riders involved in motocross racing, graphics can create a professional race-bike appearance while providing space for rider numbers and sponsor branding.
A critical part of Custom Dirt Bike Decals: A Beginner’s Complete Guide is understanding fitment.
Dirt bike plastics vary by brand, model, and model year. A graphics kit designed for one motorcycle may not correctly fit another, even if the bikes look similar.
Popular brands such as KTM, Yamaha, Honda CRF, Kawasaki KX, and Suzuki RMZ have multiple models and generations with different plastic shapes.
Before ordering, provide the exact:
Correct information helps ensure the decals are designed for the right surfaces.
When learning Custom Dirt Bike Decals: A Beginner’s Complete Guide, material quality is another important consideration.
Most dirt bike graphics are produced using specialized vinyl designed for outdoor and powersports applications. The vinyl needs to handle exposure to sunlight, moisture, dirt, vibration, and regular cleaning.
Quality vinyl decal kits can also provide better flexibility around curves and edges.
Ask about the vinyl construction, adhesive, printing process, and protective laminate before ordering. These factors can influence the appearance and longevity of the finished graphics.
The design is where customization becomes exciting.
You can choose a clean factory-inspired style, bold racing graphics, retro patterns, minimalist designs, or completely original artwork.
When following Custom Dirt Bike Decals: A Beginner’s Complete Guide, beginners should remember that a good design isn’t necessarily the most complicated one.
Strong color combinations, readable race numbers, balanced shapes, and consistent typography can often create a more professional appearance than a design overloaded with different elements.
Race numbers are an important part of dirt bike graphics.
If you participate in motocross racing, adding your number to the front plate and side panels can make your motorcycle easier to identify.
You can also add your last name, nickname, or team name.
Keep the typography consistent throughout the graphics package. A bold, readable number usually works better than an overly decorative font.
Color selection is another important lesson in Custom Dirt Bike Decals: A Beginner’s Complete Guide.
Start by selecting two or three primary colors. Then add an accent color if necessary.
For example, a black-and-white foundation with a bright accent can create a strong racing appearance without becoming visually overwhelming.
You can also coordinate your graphics with your helmet, jersey, boots, and other riding equipment.
A consistent color palette helps the complete rider-and-bike setup look professionally designed.
Even the best graphics won’t look good if the motorcycle isn’t prepared correctly.
Before installing your decals, remove dirt, grease, wax, silicone, and other contaminants from the plastics.
Old graphics and adhesive should be completely removed. The plastic should be clean and dry before installation.
If the plastics are heavily scratched or damaged, consider replacing them before installing new graphics. A clean, smooth surface provides a better foundation for your new kit.
Installation is one of the most important sections of Custom Dirt Bike Decals: A Beginner’s Complete Guide.
Start by positioning each decal without removing all of the backing. Confirm the alignment before committing the adhesive.
Work gradually across the panel, pressing the vinyl down as you go. A suitable squeegee can help reduce air bubbles and wrinkles.
For curved sections, controlled heat can make vinyl more flexible and easier to conform to the plastic. Avoid excessive heat or aggressive stretching.
Pay particular attention to edges and corners because these areas are more likely to lift if they aren’t properly installed.
New installers often make the same mistakes.
Don’t install graphics on dirty plastics. Don’t rush the alignment. Don’t stretch vinyl excessively. Don’t use excessive heat. Don’t immediately wash the motorcycle after installation.
Another common mistake is trying to reposition a decal repeatedly after significant adhesive contact has already occurred.
Taking your time during preparation and installation usually produces a much cleaner result.
Once you’ve installed your decals, proper maintenance can help keep them looking their best.
After riding, rinse off loose dirt before wiping the surface. Use a mild motorcycle-safe cleaning solution and a soft microfiber cloth.
Avoid abrasive brushes and aggressive chemicals. Be careful when using a pressure washer around decal edges.
If you notice a corner beginning to lift, address it early rather than pulling the graphic further.
Proper maintenance is especially important for riders who frequently participate in motocross racing or ride in muddy conditions.
Custom Dirt Bike Decals: A Beginner’s Complete Guide isn’t just about stickers. It’s about creating a complete visual identity for your motorcycle.
Consider coordinating your graphics with your seat cover, number plate, wheels, riding gear, and helmet.
Whether you’re building a KTM, Yamaha, Honda CRF, Kawasaki KX, or Suzuki RMZ, matching design elements can make the motorcycle look significantly more cohesive.
Start Your Graphics with Boondocks Decals to begin planning a custom graphics package for your bike.
Even high-quality graphics eventually show signs of use.
Fading, peeling, tearing, heavy scratches, and damaged edges can indicate that it’s time for a replacement.
Some riders also replace their graphics simply because they want a new style. A fresh vinyl decal kit can completely change the appearance of the motorcycle without requiring major mechanical modifications.
There are several reasons custom graphics are popular among new and experienced riders:
The key is choosing graphics that fit your exact motorcycle and are produced using suitable materials.
This Custom Dirt Bike Decals: A Beginner’s Complete Guide shows that creating a professional-looking motorcycle doesn’t have to be complicated. Start with accurate bike information, choose quality vinyl decal kits, select a balanced design, prepare your plastics carefully, and take your time during installation.
Whether you’re riding a KTM, Yamaha, Honda CRF, Kawasaki KX, or Suzuki RMZ, custom dirt bike graphics can give your motorcycle a distinctive look while creating a consistent identity for the rider.
For riders interested in motocross racing or simply upgrading their weekend bike, a well-designed graphics package can be one of the most noticeable visual modifications you can make.
Visit Boondocks Decals to explore custom dirt bike graphics and vinyl decal kits.
Ready to create your custom design? Contact Boondocks Decals today and start building a graphics package designed specifically for your motorcycle.
Custom dirt bike decals are vinyl graphics designed specifically for a motorcycle’s plastics. They can include custom colors, patterns, race numbers, rider names, logos, and other personalized elements.
Yes. Custom graphics can be designed for many different dirt bike brands and models. Always provide the exact motorcycle model and year to ensure proper fitment.
Quality vinyl decal kits are designed for demanding outdoor environments and can withstand normal exposure to dirt, moisture, sunlight, and regular riding. Proper installation and maintenance can also improve their longevity.
Yes. Beginners can install graphics themselves with careful preparation, patience, and the right tools. Cleaning the plastics thoroughly and taking time with alignment are especially important.
Yes. Custom dirt bike graphics can typically include race numbers, rider names, team names, and other design elements. Make sure numbers remain clear and readable for motocross racing.
Boondocks Decals offers custom dirt bike graphics and vinyl decal kits. You can also start your graphics design to begin creating a personalized design for your bike.
Get in touch today for fast support and professional motocross graphics assistance.