
High Quality & Great Pricing l # Plates from $29 l Dirt Bike Kits $175 l Stickers 12 @ $9
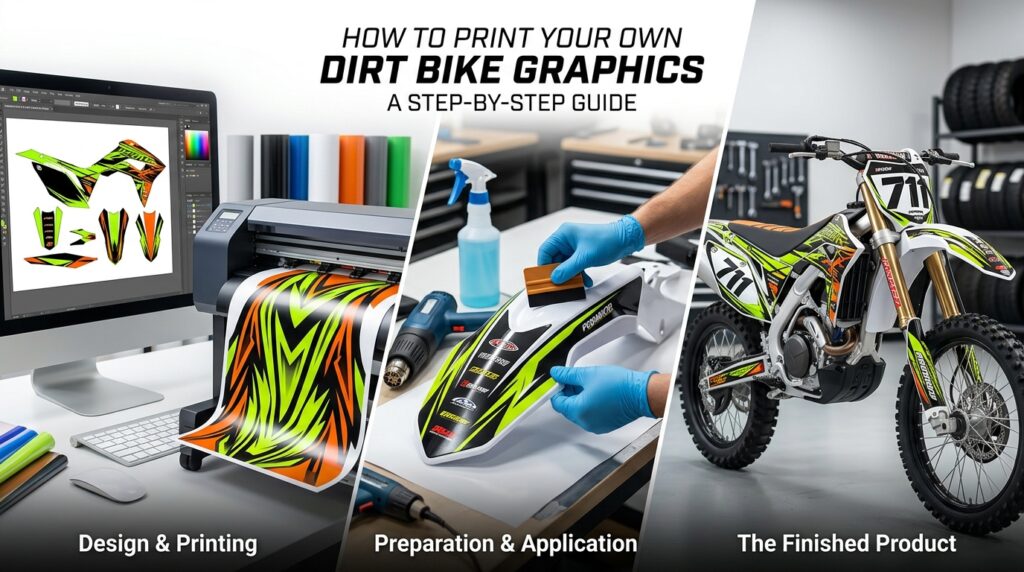
Printing your own graphics can be a rewarding way to personalize a motocross bike, especially if you want complete control over colors, numbers, logos, and layout. With the right software, printable vinyl, equipment, and preparation, you can create a custom look for practice bikes, race builds, restorations, or personal projects.
This How to Print Your Own Dirt Bike Graphics: Step-by-Step Guide explains the full process from creating a template and choosing materials to printing, laminating, cutting, and installing your finished graphics. Whether you ride a KTM, Yamaha, Honda CRF, Kawasaki KX, or Suzuki RMZ, planning each stage carefully can produce a cleaner and more professional result.
One of the biggest advantages of making your own dirt bike graphics is creative freedom.
You can choose your preferred colors, rider number, name, logos, patterns, and overall style instead of relying only on ready-made designs.
For riders involved in motocross racing, custom graphics can also help create a recognizable identity. Teams, amateur racers, content creators, and recreational riders can coordinate graphics with jerseys, helmets, sponsor branding, or personal colors.
The key lesson in How to Print Your Own Dirt Bike Graphics: Step-by-Step Guide is that good results depend on preparation just as much as design.
The first step is getting an accurate template for your specific motorcycle.
A KTM graphics template will not match a Yamaha, and a Honda CRF template will not fit a Kawasaki KX or Suzuki RMZ. Even bikes from the same manufacturer can use different plastics depending on model and year.
Your template should represent areas such as radiator shrouds, number plates, fenders, fork guards, and side panels.
This is one of the most important parts of How to Print Your Own Dirt Bike Graphics: Step-by-Step Guide because incorrect sizing can cause poor alignment during installation.
Before designing anything, double-check the exact motorcycle model and production year.
If the bike has aftermarket plastics, verify whether those panels follow the original factory dimensions.
Once you have a template, open it in compatible vector or graphics-design software.
Build your design directly around the panel shapes.
Keep important elements away from trimming edges, bolt holes, vents, and sharp curves where possible.
Popular design elements include rider numbers, names, sponsor logos, team branding, gradients, patterns, geometric shapes, and manufacturer-inspired colors.
When following How to Print Your Own Dirt Bike Graphics: Step-by-Step Guide, keep your design visually consistent across every panel.
Use similar colors, typography, and shapes throughout the kit so the motorcycle looks like one complete design.
Color can make or break your graphics.
KTM riders often build around orange, while Yamaha bikes naturally work with blue. Honda CRF motorcycles are associated with red, Kawasaki KX with green, and Suzuki RMZ with yellow.
You do not have to stay with factory colors, but they can provide a useful starting point.
For motocross racing, make sure numbers remain easy to read.
Strong contrast between number and background colors improves visibility and usually creates a cleaner professional appearance.
This visual strategy is an essential part of How to Print Your Own Dirt Bike Graphics: Step-by-Step Guide.
Not all vinyl is suitable for dirt bike graphics.
Motorcycle plastics experience vibration, dirt, water, mud, boots, washing, and regular handling. You therefore need printable adhesive vinyl designed for durable decal applications.
Quality vinyl decal kits generally use thicker, stronger materials than ordinary craft stickers.
The adhesive should be appropriate for plastic surfaces, while the printed surface should be compatible with your printer and ink system.
Cheap materials may appear acceptable at first but can struggle with curved panels, edges, moisture, and repeated riding conditions.
Printing quality matters.
Professional graphics businesses typically use wide-format printers and compatible outdoor-grade ink systems designed for durable vinyl printing.
For home projects, your printer must specifically support the printable vinyl you plan to use.
Always check media compatibility before printing.
The biggest mistake people make when learning How to Print Your Own Dirt Bike Graphics: Step-by-Step Guide is assuming ordinary paper-printing equipment will automatically deliver professional motocross results.
Test a small piece first to check color, adhesion, ink drying, and print clarity before committing to the full graphics set.
Make sure your design prints at 100% of the intended template size.
Accidental scaling can make an otherwise perfect design impossible to install.
Check your printer settings carefully and avoid options such as “fit to page” when exact dimensions are required.
Printing a small measurement test before producing the entire kit can help confirm that the dimensions are correct.
This quality-control step makes How to Print Your Own Dirt Bike Graphics: Step-by-Step Guide much more reliable.
Printing is only part of the process.
A protective laminate can help shield the printed graphics from rubbing, moisture, dirt, and normal cosmetic wear.
Apply the laminate carefully to avoid bubbles, wrinkles, or contamination between layers.
For dirt bike graphics, laminate also contributes to the thickness and feel of the completed decal.
If your motorcycle is used regularly for motocross racing, protection becomes even more important because the graphics may experience repeated contact with boots, riding gear, mud, and washing.
After printing and laminating, the graphics must be cut to match the template.
A vinyl cutter or plotter provides greater accuracy than hand-cutting complex shapes.
If cutting manually, use a sharp blade and work carefully.
Poor trimming can leave rough edges, inaccurate corners, or uneven gaps around plastic contours.
Precise cutting is another essential part of How to Print Your Own Dirt Bike Graphics: Step-by-Step Guide because even an excellent design can look unprofessional if the edges do not align properly.
Before installation, clean the motorcycle plastics thoroughly.
Remove existing graphics, old adhesive, dirt, grease, wax, polish, and any other residue that could interfere with adhesion.
Clean, dry plastics provide a better surface for vinyl decal kits.
Whenever possible, remove the panels from the motorcycle before application. Working with individual plastics often makes alignment easier.
Position each piece before pressing it firmly into place.
Use reference points such as bolt holes, panel edges, vents, and body lines to confirm alignment.
Work gradually rather than applying the entire graphic at once.
Apply controlled pressure from one area toward the edges to reduce bubbles and wrinkles.
Curved sections may require extra patience.
The final lesson from How to Print Your Own Dirt Bike Graphics: Step-by-Step Guide is simple: do not rush installation. Careful placement has a major impact on how professional the finished motorcycle looks.
Printing your own graphics can be a fun project, especially if you enjoy design and already have access to suitable printing equipment.
However, professional production may be more practical when you need precise templates, premium materials, consistent colors, accurate cutting, and a complete bike-specific kit.
Professional services can also save time if you would rather focus on the design concept instead of managing printing, laminating, and cutting yourself.
If you want a customized solution without handling every production step, explore How to Print Your Own Dirt Bike Graphics: Step-by-Step Guide and start building a graphics package around your bike and style.
Test color, size, ink adhesion, and laminate compatibility before printing the complete kit.
Too many colors, fonts, and logos can make dirt bike graphics look cluttered.
Low-quality logos or images may appear blurry when printed at full size.
Always verify the exact KTM, Yamaha, Honda CRF, Kawasaki KX, Suzuki RMZ, or other model before cutting the final vinyl.
Learning How to Print Your Own Dirt Bike Graphics: Step-by-Step Guide gives you greater control over how your motocross bike looks.
From selecting the correct template and designing your artwork to printing, laminating, cutting, and installation, every stage contributes to the finished result.
Whether you are customizing a KTM, Yamaha, Honda CRF, Kawasaki KX, or Suzuki RMZ, properly planned dirt bike graphics can help create a distinctive motocross racing identity.
For riders who want premium vinyl decal kits without managing the complete printing process themselves, professional customization can be a practical alternative.
Ready to create graphics designed around your motorcycle, rider number, colors, and personal style? Contact Boondocks Decals to discuss your custom dirt bike graphics project.
Yes, you can print your own dirt bike graphics if you have suitable printable vinyl, compatible inks, accurate bike templates, cutting tools, and protective laminate. Professional-quality results generally require equipment designed for durable vinyl graphics.
Use durable printable adhesive vinyl intended for decal or vehicle-style applications. The material should handle curved plastics, moisture, dirt, washing, and normal riding conditions better than basic craft vinyl.
Protective laminate is highly recommended because it can help protect printed artwork from rubbing, moisture, dirt, and cosmetic wear. It also adds durability to finished vinyl decal kits.
Use a template made for the exact motorcycle make, model, and year. KTM, Yamaha, Honda CRF, Kawasaki KX, and Suzuki RMZ plastics vary by model and generation, so accurate templates are essential.
Vector-based graphics software is usually the most practical choice because it allows you to work with precise shapes, scalable logos, typography, and panel templates. Always design at the correct scale before printing.
DIY printing can be worthwhile if you already have the correct equipment and enjoy the production process. Professionally produced graphics may be better if you want accurate fitment, durable materials, professional printing, precise cutting, and a more streamlined customization process.
Get in touch today for fast support and professional motocross graphics assistance.